Git hooks는 개발자의 생산성을 극대화하고 코드 품질을 자동으로 관리할 수 있는 강력한 도구입니다.
특히 pre-commit hook을 활용하면 커밋 전 자동 검증 시스템을 구축하여 팀 전체의 코드 일관성을 유지할 수 있습니다.
이 글에서는 실제 프로젝트에서 사용할 수 있는 Git hooks 설정법부터 고급 활용 기법까지 상세히 알아보겠습니다.
Git Hooks란? 개념과 동작 원리
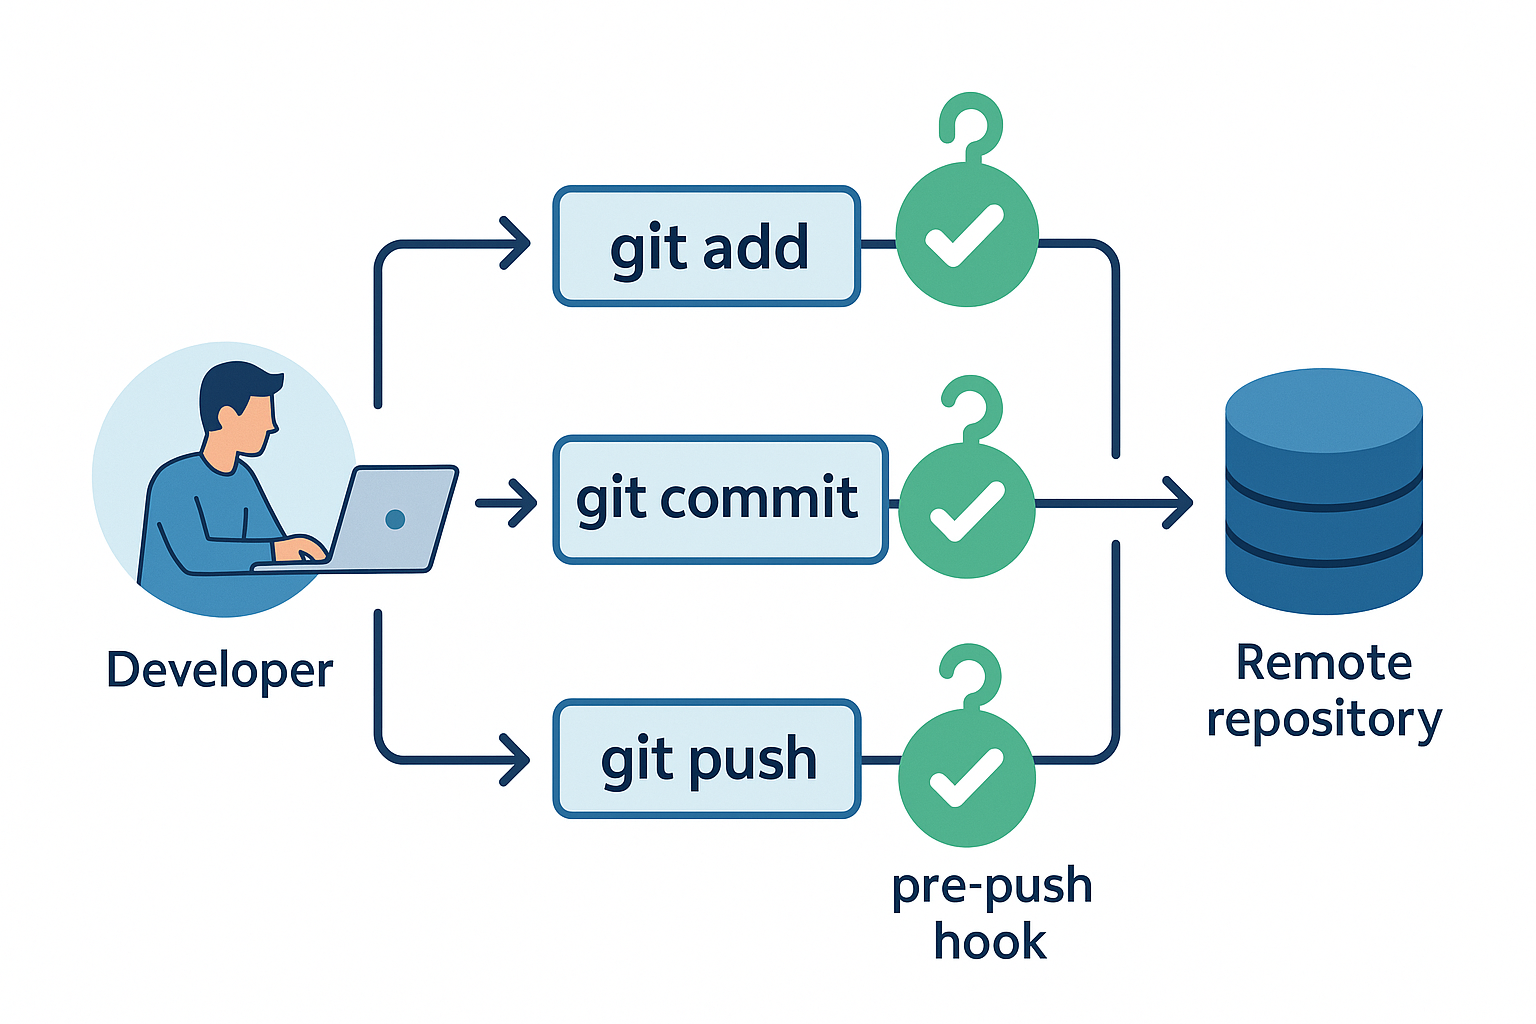
Git hooks는 Git 저장소에서 특정 이벤트가 발생했을 때 자동으로 실행되는 스크립트입니다.
.git/hooks 디렉토리에 위치하며, 커밋, 푸시, 머지 등의 Git 작업 시점에 맞춰 실행됩니다.
Git hooks의 가장 큰 장점은 개발 워크플로우를 자동화하여 인적 오류를 방지할 수 있다는 점입니다.
예를 들어, 코드 포맷팅 검사, 테스트 실행, 커밋 메시지 규칙 검증 등을 자동으로 수행할 수 있습니다.
주요 Git hooks 종류:
- pre-commit: 커밋 실행 전 동작
- commit-msg: 커밋 메시지 검증 시 동작
- pre-push: 푸시 실행 전 동작
- post-merge: 머지 완료 후 동작
Git 공식 문서를 참조하면 더 자세한 내용을 확인할 수 있습니다.

Pre-commit Hook 설정 가이드
Pre-commit hook은 가장 널리 사용되는 Git hook으로, 커밋하기 전에 코드 검증을 수행합니다.
이를 통해 문제가 있는 코드가 저장소에 커밋되는 것을 사전에 방지할 수 있습니다.
기본 Pre-commit Hook 생성
먼저 Git 저장소의 hooks 디렉토리로 이동합니다:
cd .git/hookspre-commit 파일을 생성하고 실행 권한을 부여합니다:
touch pre-commit
chmod +x pre-commit
JavaScript/Node.js 프로젝트용 Pre-commit Hook
다음은 JavaScript 프로젝트에서 사용할 수 있는 pre-commit hook 예제입니다:
#!/bin/sh

echo "Running pre-commit checks..."

# ESLint 검사
echo "🔍 Running ESLint..."
npm run lint
if [ $? -ne 0 ]; then
    echo "❌ ESLint failed. Please fix the issues before committing."
    exit 1
fi

# Prettier 포맷팅 검사
echo "🎨 Checking code formatting..."
npm run format:check
if [ $? -ne 0 ]; then
    echo "❌ Code formatting issues found. Run 'npm run format' to fix."
    exit 1
fi

# 단위 테스트 실행
echo "🧪 Running unit tests..."
npm test
if [ $? -ne 0 ]; then
    echo "❌ Tests failed. Please fix failing tests before committing."
    exit 1
fi

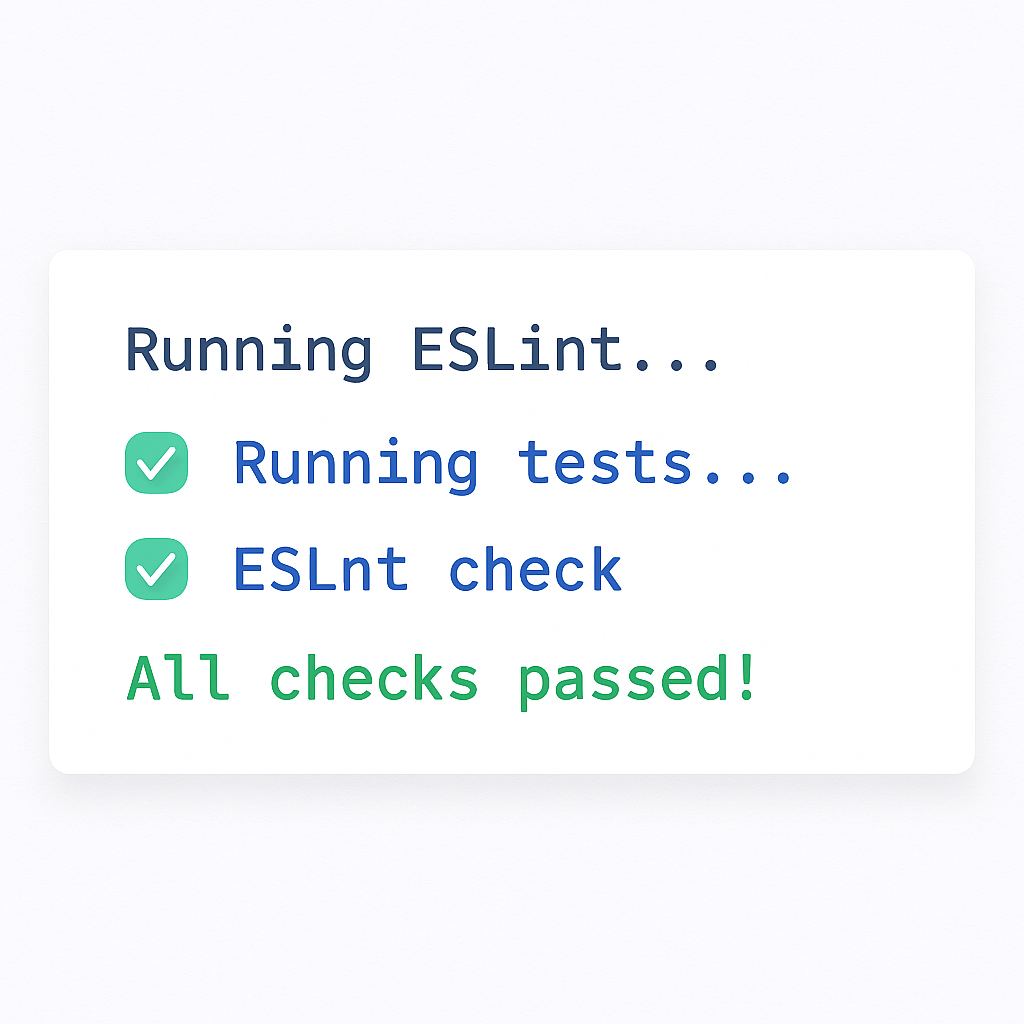
echo "✅ All pre-commit checks passed!"
exit 0
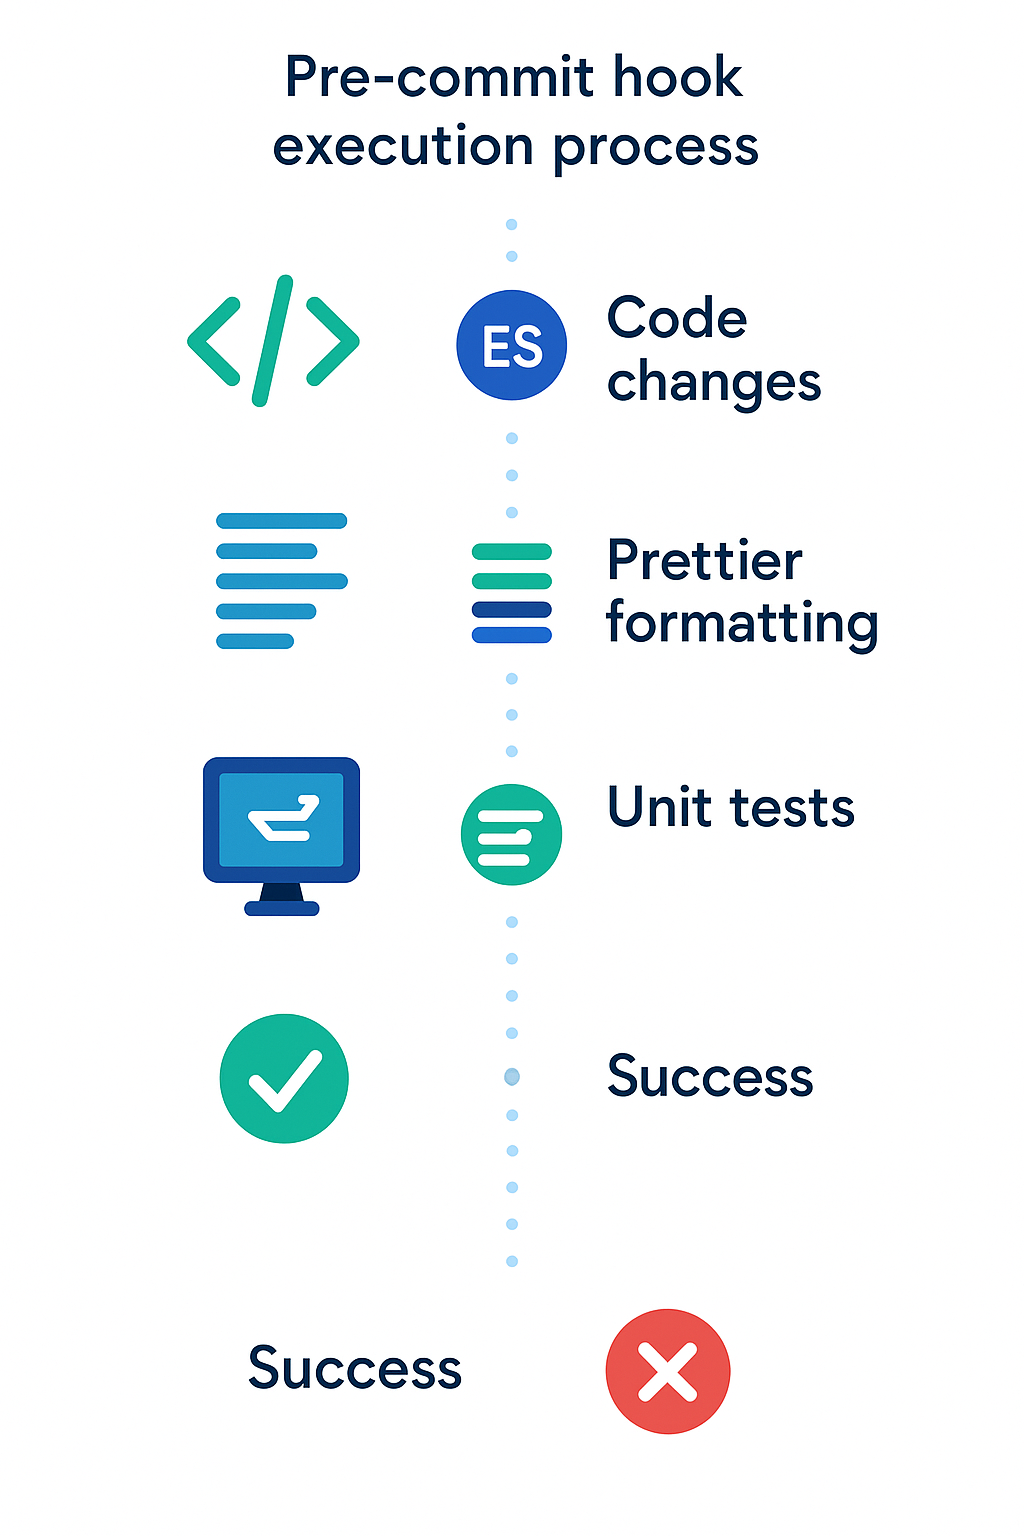
이 스크립트는 커밋 전에 ESLint 검사, 코드 포맷팅 검증, 단위 테스트를 순차적으로 실행합니다.
어느 단계에서든 실패하면 커밋이 차단되어 코드 품질을 보장할 수 있습니다.
Python 프로젝트를 위한 고급 검증 시스템
Python 프로젝트에서는 다양한 코드 품질 도구를 조합하여 강력한 검증 시스템을 구축할 수 있습니다.
Black, Flake8, mypy를 활용한 종합 검증
#!/bin/sh

echo "🐍 Python pre-commit checks starting..."

# 변경된 Python 파일만 검사
PYTHON_FILES=$(git diff --cached --name-only --diff-filter=ACM | grep '\.py$')

if [ -z "$PYTHON_FILES" ]; then
    echo "No Python files to check."
    exit 0
fi

# Black 코드 포맷팅 검사
echo "🖤 Running Black formatter check..."
python -m black --check $PYTHON_FILES
if [ $? -ne 0 ]; then
    echo "❌ Black formatting issues found. Run 'black .' to fix."
    exit 1
fi

# Flake8 코드 스타일 검사
echo "🔍 Running Flake8 linting..."
python -m flake8 $PYTHON_FILES
if [ $? -ne 0 ]; then
    echo "❌ Flake8 linting failed. Please fix the issues."
    exit 1
fi

# mypy 타입 검사
echo "🔍 Running mypy type checking..."
python -m mypy $PYTHON_FILES
if [ $? -ne 0 ]; then
    echo "❌ mypy type checking failed. Please fix type issues."
    exit 1
fi

# pytest 단위 테스트
echo "🧪 Running pytest..."
python -m pytest tests/ -v
if [ $? -ne 0 ]; then
    echo "❌ Tests failed. Please fix failing tests."
    exit 1
fi

echo "✅ All Python pre-commit checks passed!"
exit 0
이 스크립트는 변경된 Python 파일에 대해서만 검사를 수행하여 성능을 최적화합니다.
Python 코드 품질 가이드에서 더 자세한 베스트 프랙티스를 확인할 수 있습니다.

커밋 메시지 자동 검증 시스템
일관된 커밋 메시지는 프로젝트 히스토리 관리와 협업에 필수적입니다.
commit-msg hook을 활용하면 커밋 메시지 규칙을 자동으로 검증할 수 있습니다.
Conventional Commits 규칙 적용
Conventional Commits는 구조화된 커밋 메시지 작성 규칙입니다:
#!/bin/sh

# commit-msg hook for Conventional Commits validation

commit_regex='^(feat|fix|docs|style|refactor|test|chore)(\(.+\))?: .{1,50}'

if ! grep -qE "$commit_regex" "$1"; then
    echo "❌ Invalid commit message format!"
    echo ""
    echo "Commit message should follow Conventional Commits format:"
    echo "  <type>[optional scope]: <description>"
    echo ""
    echo "Types: feat, fix, docs, style, refactor, test, chore"
    echo "Example: feat(auth): add user login functionality"
    echo ""
    exit 1
fi

echo "✅ Commit message format is valid!"
exit 0
이 스크립트는 커밋 메시지가 Conventional Commits 형식을 따르는지 자동으로 검증합니다.
잘못된 형식의 커밋 메시지는 자동으로 거부되어 프로젝트의 일관성을 유지할 수 있습니다.
한국어 커밋 메시지 검증
다국어 팀에서는 한국어 커밋 메시지 규칙도 적용할 수 있습니다:
#!/bin/sh

commit_msg=$(cat "$1")
min_length=10
max_length=100

# 커밋 메시지 길이 검증
if [ ${#commit_msg} -lt $min_length ]; then
    echo "❌ 커밋 메시지가 너무 짧습니다. (최소 ${min_length}자)"
    exit 1
fi

if [ ${#commit_msg} -gt $max_length ]; then
    echo "❌ 커밋 메시지가 너무 깁니다. (최대 ${max_length}자)"
    exit 1
fi

# 금지된 단어 검사
forbidden_words="TODO|FIXME|DEBUG|TEMP"
if echo "$commit_msg" | grep -qiE "$forbidden_words"; then
    echo "❌ 커밋 메시지에 금지된 단어가 포함되어 있습니다."
    exit 1
fi

echo "✅ 커밋 메시지 검증 완료!"
exit 0
Pre-push Hook으로 원격 저장소 보호
Pre-push hook은 코드를 원격 저장소에 푸시하기 전 마지막 검증 단계입니다.
특히 main/master 브랜치에 대한 보호와 CI/CD 파이프라인 연동에 유용합니다.
브랜치 보호 및 통합 테스트
#!/bin/sh

protected_branch='refs/heads/main'
current_branch=$(git symbolic-ref HEAD)

# main 브랜치로의 직접 푸시 방지
if [ "$current_branch" = "$protected_branch" ]; then
    echo "❌ Direct push to main branch is not allowed!"
    echo "Please create a feature branch and submit a pull request."
    exit 1
fi

# 원격 저장소와 동기화 상태 확인
echo "🔄 Checking remote repository sync status..."
git fetch origin

LOCAL=$(git rev-parse HEAD)
REMOTE=$(git rev-parse @{u} 2>/dev/null)
BASE=$(git merge-base HEAD @{u} 2>/dev/null)

if [ "$LOCAL" != "$REMOTE" ] && [ "$LOCAL" != "$BASE" ]; then
    echo "⚠️  Your branch is behind the remote. Please pull latest changes first."
    exit 1
fi

# 통합 테스트 실행
echo "🧪 Running integration tests..."
npm run test:integration
if [ $? -ne 0 ]; then
    echo "❌ Integration tests failed. Push cancelled."
    exit 1
fi

echo "✅ All pre-push checks passed!"
exit 0
이 hook은 main 브랜치로의 직접 푸시를 방지하고, 통합 테스트를 실행하여 안정성을 보장합니다.
Git 브랜치 전략 가이드를 참조하면 효과적인 브랜치 관리 방법을 학습할 수 있습니다.

Husky와 lint-staged를 활용한 모던 접근법
수동으로 Git hooks를 관리하는 것은 번거로울 수 있습니다.
Husky와 lint-staged를 사용하면 더 효율적으로 Git hooks를 관리할 수 있습니다.
Husky 설치 및 설정
# Husky 설치
npm install --save-dev husky

# Husky 초기화
npx husky install

# package.json에 prepare 스크립트 추가
npm pkg set scripts.prepare="husky install"
lint-staged와 함께 사용하기
# lint-staged 설치
npm install --save-dev lint-staged
package.json 설정:
{
  "lint-staged": {
    "*.{js,jsx,ts,tsx}": [
      "eslint --fix",
      "prettier --write"
    ],
    "*.{css,scss,md}": [
      "prettier --write"
    ],
    "*.py": [
      "black",
      "flake8"
    ]
  },
  "scripts": {
    "prepare": "husky install"
  }
}
pre-commit hook 생성:
npx husky add .husky/pre-commit "npx lint-staged"이 설정으로 변경된 파일에만 린팅과 포맷팅이 적용되어 성능이 크게 향상됩니다.
Docker 환경에서의 Git Hooks 활용
컨테이너 환경에서도 Git hooks를 효과적으로 활용할 수 있습니다.
특히 일관된 개발 환경 구축과 CI/CD 파이프라인 통합에 유용합니다.
Docker Compose를 활용한 테스트 환경
#!/bin/sh
# pre-commit hook for Docker environment

echo "🐳 Running tests in Docker environment..."

# Docker Compose로 테스트 환경 구성
docker-compose -f docker-compose.test.yml up --build --abort-on-container-exit

test_result=$?

# 테스트 컨테이너 정리
docker-compose -f docker-compose.test.yml down

if [ $test_result -ne 0 ]; then
    echo "❌ Docker tests failed. Commit cancelled."
    exit 1
fi

echo "✅ Docker tests passed!"
exit 0
멀티 스테이지 검증 시스템
# docker-compose.test.yml
version: '3.8'
services:
  lint:
    build: .
    command: npm run lint
    volumes:
      - .:/app
    working_dir: /app

  test:
    build: .
    command: npm test
    volumes:
      - .:/app
    working_dir: /app
    depends_on:
      - lint

  security-scan:
    build: .
    command: npm audit
    volumes:
      - .:/app
    working_dir: /app
    depends_on:
      - test
팀 협업을 위한 Git Hooks 관리 전략
팀 단위로 Git hooks를 관리할 때는 일관성과 유지보수성을 고려해야 합니다.
공유 가능한 Hooks 템플릿 생성
프로젝트 루트에 hooks 디렉토리를 생성하고 공통 hook 템플릿을 관리합니다:
# 프로젝트 구조
project/
├── hooks/
│   ├── pre-commit
│   ├── commit-msg
│   └── pre-push
├── scripts/
│   └── install-hooks.sh
└── package.json
자동 설치 스크립트:
#!/bin/bash
# scripts/install-hooks.sh

echo "Installing Git hooks..."

# hooks 디렉토리에서 .git/hooks로 복사
cp hooks/* .git/hooks/

# 실행 권한 부여
chmod +x .git/hooks/*

echo "✅ Git hooks installed successfully!"
환경별 설정 분리
개발, 스테이징, 프로덕션 환경에 따라 다른 검증 규칙을 적용할 수 있습니다:
#!/bin/sh
# 환경별 설정을 읽는 pre-commit hook

# 환경 변수 또는 설정 파일에서 환경 확인
ENVIRONMENT=${GIT_HOOKS_ENV:-development}

case $ENVIRONMENT in
  "development")
    echo "🔧 Running development checks..."
    npm run lint:dev
    ;;
  "staging")
    echo "🚀 Running staging checks..."
    npm run lint
    npm run test
    ;;
  "production")
    echo "🏭 Running production checks..."
    npm run lint
    npm run test
    npm run security:check
    ;;
esac
트러블슈팅과 디버깅 가이드
Git hooks 사용 중 발생할 수 있는 일반적인 문제들과 해결 방법을 알아보겠습니다.
일반적인 문제와 해결책
1. Hook이 실행되지 않는 경우:
# 실행 권한 확인 및 부여
ls -la .git/hooks/pre-commit
chmod +x .git/hooks/pre-commit
2. 스크립트 경로 문제:
#!/bin/sh
# 절대 경로 사용
export PATH="/usr/local/bin:/usr/bin:/bin:$PATH"

# Node.js 경로 설정
export NVM_DIR="$HOME/.nvm"
[ -s "$NVM_DIR/nvm.sh" ] && \. "$NVM_DIR/nvm.sh"
3. Hook 건너뛰기 (긴급 상황용):
# 특정 hook 건너뛰기
git commit --no-verify -m "Emergency fix"

# 모든 hook 건너뛰기
git push --no-verify
디버깅을 위한 로깅 시스템
#!/bin/sh
# 디버깅이 가능한 pre-commit hook

LOG_FILE=".git/hooks/pre-commit.log"
DEBUG=${GIT_HOOKS_DEBUG:-false}

log() {
    if [ "$DEBUG" = "true" ]; then
        echo "[$(date)] $1" >> $LOG_FILE
        echo "$1"
    fi
}

log "Pre-commit hook started"
log "Current directory: $(pwd)"
log "Git status: $(git status --porcelain)"

# 실제 검증 로직...

log "Pre-commit hook completed successfully"
디버그 모드 실행:
GIT_HOOKS_DEBUG=true git commit -m "Test commit"성능 최적화 및 모니터링
대규모 프로젝트에서는 Git hooks의 실행 시간을 최적화하는 것이 중요합니다.
병렬 처리를 통한 성능 향상
#!/bin/sh
# 병렬 처리를 활용한 pre-commit hook

echo "🚀 Running parallel pre-commit checks..."

# 백그라운드에서 각 검사 실행
{
    echo "🔍 ESLint check..."
    npm run lint > /tmp/eslint.log 2>&1
    echo $? > /tmp/eslint.exit
} &

{
    echo "🎨 Prettier check..."
    npm run format:check > /tmp/prettier.log 2>&1
    echo $? > /tmp/prettier.exit
} &

{
    echo "🧪 Unit tests..."
    npm run test:unit > /tmp/test.log 2>&1
    echo $? > /tmp/test.exit
} &

# 모든 백그라운드 작업 완료 대기
wait

# 결과 확인
if [ "$(cat /tmp/eslint.exit)" != "0" ]; then
    echo "❌ ESLint failed:"
    cat /tmp/eslint.log
    exit 1
fi

if [ "$(cat /tmp/prettier.exit)" != "0" ]; then
    echo "❌ Prettier check failed:"
    cat /tmp/prettier.log
    exit 1
fi

if [ "$(cat /tmp/test.exit)" != "0" ]; then
    echo "❌ Tests failed:"
    cat /tmp/test.log
    exit 1
fi

# 임시 파일 정리
rm -f /tmp/eslint.* /tmp/prettier.* /tmp/test.*

echo "✅ All checks passed!"
실행 시간 모니터링
#!/bin/sh
# 실행 시간을 측정하는 wrapper

start_time=$(date +%s)

# 실제 hook 로직 실행
./actual-pre-commit-hook.sh
hook_exit_code=$?

end_time=$(date +%s)
execution_time=$((end_time - start_time))

echo "⏱️  Hook execution time: ${execution_time} seconds"

# 실행 시간 로그 저장
echo "$(date): ${execution_time}s" >> .git/hooks/timing.log

exit $hook_exit_code
CI/CD 파이프라인과의 통합
Git hooks를 CI/CD 파이프라인과 연동하면 더욱 강력한 자동화 시스템을 구축할 수 있습니다.
GitHub Actions 연동
# .github/workflows/pre-commit.yml
name: Pre-commit Checks

on:
  pull_request:
    branches: [ main, develop ]

jobs:
  pre-commit:
    runs-on: ubuntu-latest
    steps:
    - uses: actions/checkout@v3

    - name: Set up Node.js
      uses: actions/setup-node@v3
      with:
        node-version: '18'
        cache: 'npm'

    - name: Install dependencies
      run: npm ci

    - name: Run pre-commit hooks
      run: |
        npm run lint
        npm run test
        npm run build
Jenkins 파이프라인 연동
pipeline {
    agent any

    stages {
        stage('Pre-commit Checks') {
            parallel {
                stage('Linting') {
                    steps {
                        sh 'npm run lint'
                    }
                }
                stage('Testing') {
                    steps {
                        sh 'npm run test'
                    }
                }
                stage('Security Scan') {
                    steps {
                        sh 'npm audit'
                    }
                }
            }
        }
    }

    post {
        failure {
            emailext (
                subject: "Pre-commit checks failed: ${env.JOB_NAME} - ${env.BUILD_NUMBER}",
                body: "Build failed. Please check the logs.",
                to: "${env.CHANGE_AUTHOR_EMAIL}"
            )
        }
    }
}
Jenkins 파이프라인 가이드에서 더 자세한 설정 방법을 확인할 수 있습니다.
보안 강화를 위한 Git Hooks 활용
코드 보안은 현대 소프트웨어 개발에서 필수적인 요소입니다.
Git hooks를 활용하여 보안 취약점을 사전에 차단할 수 있습니다.
민감 정보 누출 방지
#!/bin/sh
# 민감 정보 검사를 위한 pre-commit hook

echo "🔒 Checking for sensitive information..."

# 금지된 패턴 정의
SENSITIVE_PATTERNS=(
    "password\s*=\s*['\"][^'\"]*['\"]"
    "api_key\s*=\s*['\"][^'\"]*['\"]"
    "secret\s*=\s*['\"][^'\"]*['\"]"
    "token\s*=\s*['\"][^'\"]*['\"]"
    "-----BEGIN\s+(RSA\s+)?PRIVATE\s+KEY-----"
)

# 커밋될 파일들 검사
files=$(git diff --cached --name-only --diff-filter=ACM)

for file in $files; do
    if [ -f "$file" ]; then
        for pattern in "${SENSITIVE_PATTERNS[@]}"; do
            if grep -qiE "$pattern" "$file"; then
                echo "❌ Sensitive information detected in $file"
                echo "Pattern: $pattern"
                exit 1
            fi
        done
    fi
done

echo "✅ No sensitive information detected"
exit 0
의존성 보안 검사
#!/bin/sh
# 의존성 보안 검사

echo "🛡️  Running security audit..."

# npm 보안 감사
npm audit --audit-level moderate
if [ $? -ne 0 ]; then
    echo "❌ Security vulnerabilities found in dependencies"
    echo "Run 'npm audit fix' to resolve issues"
    exit 1
fi

# Python 의존성 보안 검사 (safety 사용)
if [ -f "requirements.txt" ]; then
    safety check -r requirements.txt
    if [ $? -ne 0 ]; then
        echo "❌ Python security vulnerabilities found"
        exit 1
    fi
fi

echo "✅ Security audit passed"
exit 0
마이크로서비스 환경에서의 Git Hooks 전략
마이크로서비스 아키텍처에서는 여러 서비스 간의 일관성을 유지하는 것이 중요합니다.
Git hooks를 활용하여 서비스 간 호환성을 자동으로 검증할 수 있습니다.
API 스키마 검증
#!/bin/sh
# API 스키마 호환성 검사

echo "🔗 Checking API schema compatibility..."

# OpenAPI 스키마 검증
if [ -f "openapi.yaml" ]; then
    swagger-codegen validate -i openapi.yaml
    if [ $? -ne 0 ]; then
        echo "❌ OpenAPI schema validation failed"
        exit 1
    fi
fi

# GraphQL 스키마 검증
if [ -f "schema.graphql" ]; then
    graphql-schema-linter schema.graphql
    if [ $? -ne 0 ]; then
        echo "❌ GraphQL schema validation failed"
        exit 1
    fi
fi

echo "✅ API schema validation passed"
exit 0
서비스 간 계약 테스트
#!/bin/sh
# Contract testing with Pact

echo "🤝 Running contract tests..."

# Producer 계약 테스트
npm run test:pact:provider
if [ $? -ne 0 ]; then
    echo "❌ Provider contract tests failed"
    exit 1
fi

# Consumer 계약 테스트
npm run test:pact:consumer
if [ $? -ne 0 ]; then
    echo "❌ Consumer contract tests failed"
    exit 1
fi

echo "✅ Contract tests passed"
exit 0
결론 및 베스트 프랙티스
Git hooks는 개발 워크플로우 자동화의 핵심 도구입니다.
효과적인 Git hooks 활용을 위한 핵심 원칙들을 정리하면 다음과 같습니다.
핵심 베스트 프랙티스:
- 단계별 검증: 빠른 검사부터 수행하여 피드백 시간을 최소화
- 병렬 처리: 독립적인 검사들을 병렬로 실행하여 성능 향상
- 환경별 설정: 개발/스테이징/프로덕션 환경에 맞는 검증 수준 적용
- 팀 공유: 모든 팀원이 동일한 hook을 사용할 수 있도록 버전 관리
- 복구 가능성: 긴급 상황에서 hook을 우회할 수 있는 방법 제공
Git hooks를 통한 자동 검증 시스템은 초기 설정에 시간이 필요하지만, 장기적으로 개발 생산성과 코드 품질을 크게 향상시킵니다.
특히 팀 규모가 커질수록 그 효과는 더욱 명확해집니다.
지속적인 개선과 팀원들의 피드백을 통해 프로젝트에 최적화된 Git hooks 시스템을 구축해보시기 바랍니다.
효과적인 Git hooks 활용으로 더 안정적이고 효율적인 개발 환경을 만들어가시길 바랍니다.
'GIT' 카테고리의 다른 글
| Git clone vs pull vs fetch: 초보자용 프로젝트 가져오기 & 충돌 회피 팁 (0) | 2025.09.21 |
|---|---|
| .gitignore란? 사용법 + 문법 정리 (Git Ignore Tutorial) (0) | 2025.09.20 |
| Git Bisect로 버그 원인 빠르게 찾기 - 이진 탐색 디버깅 (0) | 2025.06.14 |
| GitHub Personal Access Token 재발급부터 운영 환경 적용까지 - 보안과 효율성을 동시에 잡는 완벽 가이드 (4) | 2023.12.06 |


