루아 프로그래밍 언어를 활용한 MySQL, PostgreSQL, MongoDB 데이터베이스 연동 완전 가이드와 실전 예제로 데이터베이스 프로그래밍을 마스터하세요.
현대 애플리케이션 개발에서 데이터베이스는 필수적인 구성 요소입니다.
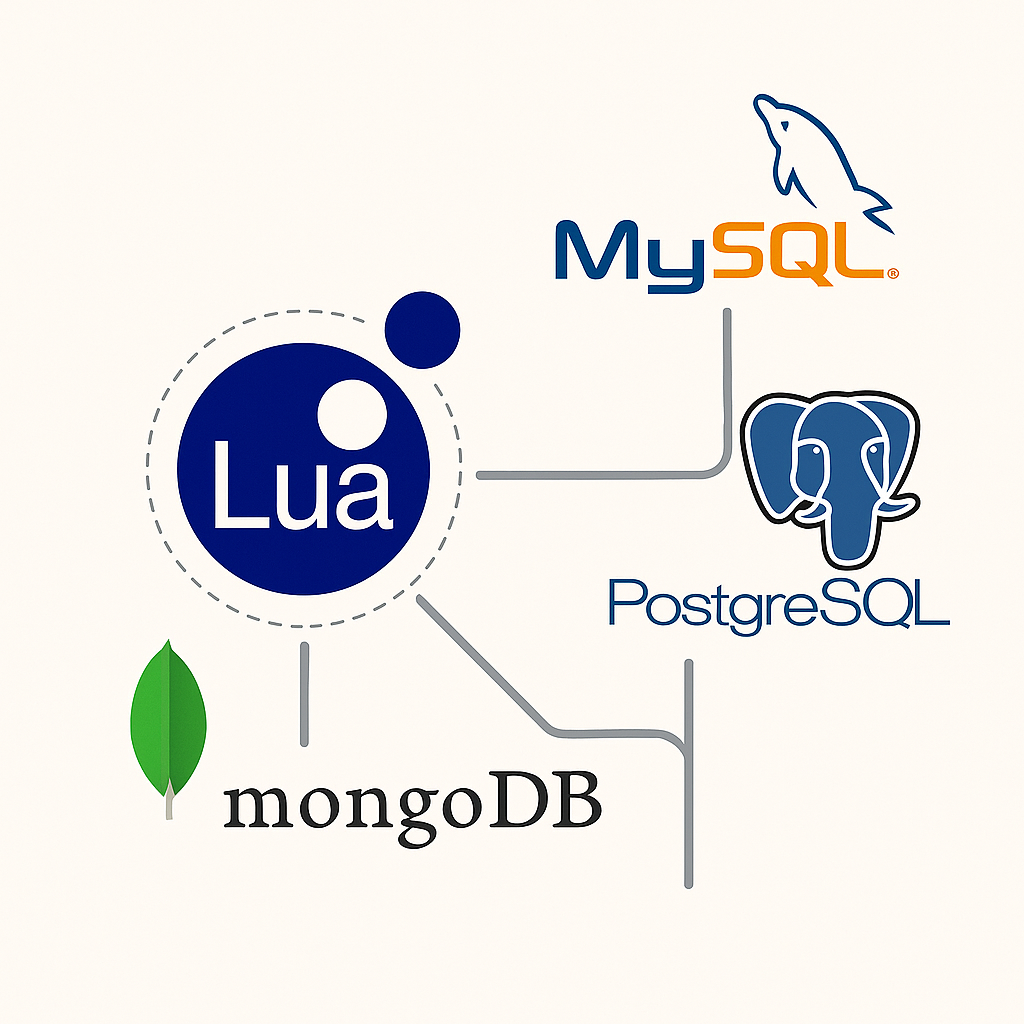
루아는 가볍고 빠른 스크립팅 언어로, 다양한 데이터베이스와의 연동을 통해 강력한 백엔드 시스템을 구축할 수 있습니다.
이번 글에서는 루아를 사용하여 주요 데이터베이스들과 연동하는 방법을 상세히 알아보겠습니다.
루아 데이터베이스 연동 개요
루아는 다양한 데이터베이스 드라이버를 지원하며, 각 데이터베이스의 특성에 맞는 연동 방법을 제공합니다.
주요 데이터베이스 연동 라이브러리는 다음과 같습니다:
- MySQL: luasql-mysql, mysql-lua
- PostgreSQL: luasql-postgres, pgmoon
- MongoDB: lua-mongo, mongo-lua-driver
- SQLite: luasql-sqlite3, lsqlite3
이러한 라이브러리들은 각각 고유한 API와 특징을 가지고 있으며, 프로젝트 요구사항에 따라 선택할 수 있습니다.

MySQL 연동 구현
MySQL 드라이버 설치
MySQL과 루아를 연동하기 위해서는 먼저 적절한 드라이버를 설치해야 합니다.
가장 널리 사용되는 luasql-mysql 라이브러리를 설치하는 방법은 다음과 같습니다:
# LuaRocks를 통한 설치
luarocks install luasql-mysql

# 또는 직접 컴파일
git clone https://github.com/keplerproject/luasql.git
cd luasql
make mysql
MySQL 연결 설정
루아에서 MySQL에 연결하는 기본적인 방법을 살펴보겠습니다:
-- MySQL 연결 모듈 로드
local driver = require "luasql.mysql"

-- 환경 생성
local env = assert(driver.mysql())

-- 데이터베이스 연결
local con = assert(env:connect("데이터베이스명", "사용자명", "비밀번호", "호스트", 포트))

-- 연결 확인
print("MySQL 연결 성공!")
MySQL CRUD 연산
데이터베이스 연동의 핵심인 CRUD(Create, Read, Update, Delete) 연산을 구현해보겠습니다:
-- 테이블 생성
local create_table = [[
    CREATE TABLE IF NOT EXISTS users (
        id INT AUTO_INCREMENT PRIMARY KEY,
        name VARCHAR(100) NOT NULL,
        email VARCHAR(150) UNIQUE NOT NULL,
        created_at TIMESTAMP DEFAULT CURRENT_TIMESTAMP
    )
]]

-- 쿼리 실행
local result = con:execute(create_table)
if result then
    print("테이블 생성 완료")
end

-- 데이터 삽입
local insert_query = string.format([[
    INSERT INTO users (name, email) VALUES ('%s', '%s')
]], "홍길동", "hong@example.com")

local affected_rows = con:execute(insert_query)
print("삽입된 행 수:", affected_rows)

-- 데이터 조회
local select_query = "SELECT * FROM users"
local cursor = con:execute(select_query)

-- 결과 처리
local row = cursor:fetch({}, "a")
while row do
    print(string.format("ID: %s, Name: %s, Email: %s",
          row.id, row.name, row.email))
    row = cursor:fetch(row, "a")
end

cursor:close()
MySQL 연결 풀 구현
성능 향상을 위한 연결 풀을 구현하면 다음과 같습니다:
local ConnectionPool = {}
ConnectionPool.__index = ConnectionPool

function ConnectionPool:new(config)
    local pool = {
        connections = {},
        config = config,
        max_connections = config.max_connections or 10,
        active_connections = 0
    }
    setmetatable(pool, ConnectionPool)
    return pool
end

function ConnectionPool:get_connection()
    if #self.connections > 0 then
        return table.remove(self.connections)
    elseif self.active_connections < self.max_connections then
        local driver = require "luasql.mysql"
        local env = driver.mysql()
        local con = env:connect(
            self.config.database,
            self.config.user,
            self.config.password,
            self.config.host,
            self.config.port
        )
        self.active_connections = self.active_connections + 1
        return con
    else
        return nil, "연결 풀이 가득 참"
    end
end

function ConnectionPool:release_connection(con)
    table.insert(self.connections, con)
end
PostgreSQL 연동 구현
PostgreSQL 드라이버 설치
PostgreSQL 연동을 위해 luasql-postgres 또는 pgmoon 라이브러리를 사용할 수 있습니다:
# luasql-postgres 설치
luarocks install luasql-postgres

# 또는 pgmoon 설치 (OpenResty 환경에서 권장)
luarocks install pgmoon
PostgreSQL 연결 및 쿼리
PostgreSQL과의 연결 방법을 살펴보겠습니다:
-- PostgreSQL 연결 (luasql-postgres 사용)
local driver = require "luasql.postgres"
local env = assert(driver.postgres())

-- 연결 문자열 구성
local connection_string = string.format(
    "host=%s port=%d dbname=%s user=%s password=%s",
    "localhost", 5432, "testdb", "postgres", "password"
)

local con = assert(env:connect(connection_string))

-- 고급 쿼리 실행
local advanced_query = [[
    WITH user_stats AS (
        SELECT
            u.id,
            u.name,
            COUNT(o.id) as order_count,
            SUM(o.total_amount) as total_spent
        FROM users u
        LEFT JOIN orders o ON u.id = o.user_id
        GROUP BY u.id, u.name
    )
    SELECT * FROM user_stats
    WHERE order_count > 0
    ORDER BY total_spent DESC
]]

local cursor = con:execute(advanced_query)
local row = cursor:fetch({}, "a")
while row do
    print(string.format("사용자: %s, 주문수: %s, 총 금액: %s",
          row.name, row.order_count, row.total_spent))
    row = cursor:fetch(row, "a")
end
PostgreSQL JSON 데이터 처리
PostgreSQL의 JSON 데이터 타입을 활용하는 방법입니다:
-- JSON 데이터 삽입
local json_insert = [[
    INSERT INTO products (name, metadata)
    VALUES ($1, $2::jsonb)
]]

-- 준비된 문장 사용 (pgmoon 라이브러리 예제)
local pgmoon = require "pgmoon"
local pg = pgmoon.new({
    host = "localhost",
    port = 5432,
    database = "testdb",
    user = "postgres",
    password = "password"
})

-- 연결
assert(pg:connect())

-- JSON 데이터 삽입
local metadata = {
    category = "electronics",
    specifications = {
        weight = "1.5kg",
        dimensions = "30x20x10cm"
    },
    tags = {"smartphone", "android", "5G"}
}

local json_str = require("cjson").encode(metadata)
local result = pg:query("INSERT INTO products (name, metadata) VALUES ($1, $2)",
                       "Galaxy S21", json_str)

-- JSON 쿼리
local json_query = [[
    SELECT name, metadata->>'category' as category,
           metadata->'specifications'->>'weight' as weight
    FROM products
    WHERE metadata @> '{"category": "electronics"}'
]]

local json_result = pg:query(json_query)
for _, row in ipairs(json_result) do
    print(string.format("제품: %s, 카테고리: %s, 무게: %s",
          row.name, row.category, row.weight))
end

MongoDB 연동 구현
MongoDB 드라이버 설치
MongoDB 연동을 위해 lua-mongo 라이브러리를 설치합니다:
# lua-mongo 설치
luarocks install lua-mongo

# 또는 직접 다운로드
git clone https://github.com/moai/lua-mongo.git
MongoDB 연결 및 기본 작업
MongoDB와의 연결 및 기본 작업을 구현해보겠습니다:
-- MongoDB 연결
local mongo = require "mongo"
local client = mongo.Client("mongodb://localhost:27017/")

-- 데이터베이스 및 컬렉션 선택
local db = client:getDatabase("testdb")
local collection = db:getCollection("users")

-- 문서 삽입
local user_doc = {
    name = "김철수",
    email = "kim@example.com",
    age = 30,
    skills = {"lua", "javascript", "python"},
    created_at = os.time()
}

local insert_result = collection:insertOne(user_doc)
print("삽입된 문서 ID:", insert_result.insertedId)

-- 문서 조회
local find_result = collection:find({name = "김철수"})
for doc in find_result:iterator() do
    print(string.format("이름: %s, 이메일: %s, 나이: %d",
          doc.name, doc.email, doc.age))
end
MongoDB 집계 파이프라인
MongoDB의 강력한 집계 기능을 활용하는 방법입니다:
-- 집계 파이프라인 구성
local pipeline = {
    {
        ["$match"] = {
            age = {["$gte"] = 25}
        }
    },
    {
        ["$group"] = {
            _id = "$department",
            avg_age = {["$avg"] = "$age"},
            total_count = {["$sum"] = 1},
            skills = {["$addToSet"] = "$skills"}
        }
    },
    {
        ["$sort"] = {
            avg_age = -1
        }
    }
}

-- 집계 실행
local aggregation_result = collection:aggregate(pipeline)
for doc in aggregation_result:iterator() do
    print(string.format("부서: %s, 평균 나이: %.1f, 인원: %d",
          doc._id, doc.avg_age, doc.total_count))
end
MongoDB 인덱스 관리
성능 최적화를 위한 인덱스 관리 방법입니다:
-- 인덱스 생성
local email_index = {
    email = 1
}
collection:createIndex(email_index, {unique = true})

-- 복합 인덱스 생성
local compound_index = {
    department = 1,
    age = -1,
    created_at = 1
}
collection:createIndex(compound_index)

-- 텍스트 인덱스 생성
local text_index = {
    name = "text",
    description = "text"
}
collection:createIndex(text_index)

-- 인덱스 조회
local indexes = collection:listIndexes()
for index in indexes:iterator() do
    print("인덱스 이름:", index.name)
    print("인덱스 키:", require("cjson").encode(index.key))
end
데이터베이스 성능 최적화
연결 관리 최적화
효율적인 데이터베이스 연결 관리를 위한 전략입니다:
-- 연결 설정 최적화
local DatabaseManager = {}
DatabaseManager.__index = DatabaseManager

function DatabaseManager:new(config)
    local manager = {
        config = config,
        connections = {},
        transaction_stack = {}
    }
    setmetatable(manager, DatabaseManager)
    return manager
end

function DatabaseManager:execute_with_retry(query, max_retries)
    max_retries = max_retries or 3
    local retries = 0

    while retries < max_retries do
        local con = self:get_connection()
        local success, result = pcall(function()
            return con:execute(query)
        end)

        if success then
            self:release_connection(con)
            return result
        else
            retries = retries + 1
            if retries < max_retries then
                -- 재시도 전 대기
                os.execute("sleep 1")
            else
                error("최대 재시도 횟수 초과: " .. tostring(result))
            end
        end
    end
end

-- 트랜잭션 관리
function DatabaseManager:begin_transaction()
    local con = self:get_connection()
    con:execute("BEGIN")
    table.insert(self.transaction_stack, con)
    return con
end

function DatabaseManager:commit_transaction()
    local con = table.remove(self.transaction_stack)
    if con then
        con:execute("COMMIT")
        self:release_connection(con)
    end
end

function DatabaseManager:rollback_transaction()
    local con = table.remove(self.transaction_stack)
    if con then
        con:execute("ROLLBACK")
        self:release_connection(con)
    end
end
쿼리 최적화 기법
데이터베이스 쿼리 성능을 향상시키는 기법들입니다:
-- 배치 처리 구현
local BatchProcessor = {}
BatchProcessor.__index = BatchProcessor

function BatchProcessor:new(db_manager, batch_size)
    local processor = {
        db_manager = db_manager,
        batch_size = batch_size or 1000,
        batch_data = {},
        processed_count = 0
    }
    setmetatable(processor, BatchProcessor)
    return processor
end

function BatchProcessor:add_item(item)
    table.insert(self.batch_data, item)

    if #self.batch_data >= self.batch_size then
        self:flush_batch()
    end
end

function BatchProcessor:flush_batch()
    if #self.batch_data == 0 then return end

    local values = {}
    for _, item in ipairs(self.batch_data) do
        table.insert(values, string.format("('%s', '%s', %d)",
                     item.name, item.email, item.age))
    end

    local batch_query = string.format(
        "INSERT INTO users (name, email, age) VALUES %s",
        table.concat(values, ", ")
    )

    local result = self.db_manager:execute_with_retry(batch_query)
    self.processed_count = self.processed_count + #self.batch_data
    self.batch_data = {}

    print(string.format("배치 처리 완료: %d개 항목", self.processed_count))
end
데이터베이스 보안 및 에러 처리
SQL 인젝션 방지
보안을 위한 SQL 인젝션 방지 방법입니다:
-- 안전한 쿼리 실행 함수
local function safe_execute(connection, query_template, params)
    -- 매개변수 검증
    for i, param in ipairs(params) do
        if type(param) == "string" then
            -- 특수 문자 이스케이프
            params[i] = connection:escape(param)
        end
    end

    -- 쿼리 구성
    local safe_query = string.format(query_template, unpack(params))

    -- 실행
    return connection:execute(safe_query)
end

-- 사용 예제
local search_query = "SELECT * FROM users WHERE name = '%s' AND age > %d"
local result = safe_execute(con, search_query, {"홍길동", 25})
에러 처리 및 로깅
견고한 에러 처리 시스템을 구현합니다:
-- 에러 처리 래퍼
local function execute_with_error_handling(connection, query, context)
    local success, result = pcall(function()
        return connection:execute(query)
    end)

    if not success then
        local error_info = {
            timestamp = os.date("%Y-%m-%d %H:%M:%S"),
            context = context,
            query = query,
            error = result
        }

        -- 로그 기록
        local log_file = io.open("database_errors.log", "a")
        log_file:write(string.format("[%s] %s - Query: %s - Error: %s\n",
                       error_info.timestamp, error_info.context,
                       error_info.query, error_info.error))
        log_file:close()

        -- 에러 재발생
        error("데이터베이스 오류: " .. result)
    end

    return result
end
실전 예제: 사용자 관리 시스템
통합 데이터베이스 추상화 레이어
다양한 데이터베이스를 지원하는 추상화 레이어를 구현해보겠습니다:
-- 데이터베이스 추상화 클래스
local DatabaseAdapter = {}
DatabaseAdapter.__index = DatabaseAdapter

function DatabaseAdapter:new(db_type, config)
    local adapter = {
        db_type = db_type,
        config = config,
        connection = nil
    }
    setmetatable(adapter, DatabaseAdapter)
    adapter:connect()
    return adapter
end

function DatabaseAdapter:connect()
    if self.db_type == "mysql" then
        local driver = require "luasql.mysql"
        local env = driver.mysql()
        self.connection = env:connect(
            self.config.database,
            self.config.user,
            self.config.password,
            self.config.host,
            self.config.port
        )
    elseif self.db_type == "postgresql" then
        local pgmoon = require "pgmoon"
        self.connection = pgmoon.new(self.config)
        self.connection:connect()
    elseif self.db_type == "mongodb" then
        local mongo = require "mongo"
        local client = mongo.Client(self.config.connection_string)
        self.connection = client:getDatabase(self.config.database)
    end
end

-- 사용자 관리 시스템
local UserManager = {}
UserManager.__index = UserManager

function UserManager:new(db_adapter)
    local manager = {
        db = db_adapter
    }
    setmetatable(manager, UserManager)
    return manager
end

function UserManager:create_user(user_data)
    if self.db.db_type == "mongodb" then
        local collection = self.db.connection:getCollection("users")
        return collection:insertOne(user_data)
    else
        local query = string.format(
            "INSERT INTO users (name, email, age) VALUES ('%s', '%s', %d)",
            user_data.name, user_data.email, user_data.age
        )
        return self.db.connection:execute(query)
    end
end

function UserManager:get_user_by_email(email)
    if self.db.db_type == "mongodb" then
        local collection = self.db.connection:getCollection("users")
        return collection:findOne({email = email})
    else
        local query = string.format("SELECT * FROM users WHERE email = '%s'", email)
        local cursor = self.db.connection:execute(query)
        return cursor:fetch({}, "a")
    end
end
데이터베이스 마이그레이션 시스템
데이터베이스 스키마 변경을 관리하는 마이그레이션 시스템입니다:
-- 마이그레이션 관리자
local MigrationManager = {}
MigrationManager.__index = MigrationManager

function MigrationManager:new(db_adapter)
    local manager = {
        db = db_adapter,
        migrations = {}
    }
    setmetatable(manager, MigrationManager)
    manager:init_migration_table()
    return manager
end

function MigrationManager:init_migration_table()
    local create_table = [[
        CREATE TABLE IF NOT EXISTS migrations (
            id INT AUTO_INCREMENT PRIMARY KEY,
            name VARCHAR(255) NOT NULL,
            executed_at TIMESTAMP DEFAULT CURRENT_TIMESTAMP
        )
    ]]
    self.db.connection:execute(create_table)
end

function MigrationManager:add_migration(name, up_sql, down_sql)
    self.migrations[name] = {
        up = up_sql,
        down = down_sql
    }
end

function MigrationManager:run_migrations()
    for name, migration in pairs(self.migrations) do
        local check_query = string.format(
            "SELECT COUNT(*) as count FROM migrations WHERE name = '%s'", name
        )
        local cursor = self.db.connection:execute(check_query)
        local result = cursor:fetch({}, "a")

        if result.count == 0 then
            -- 마이그레이션 실행
            self.db.connection:execute(migration.up)

            -- 마이그레이션 기록
            local record_query = string.format(
                "INSERT INTO migrations (name) VALUES ('%s')", name
            )
            self.db.connection:execute(record_query)

            print("마이그레이션 완료:", name)
        end
    end
end
데이터베이스 선택 가이드
각 데이터베이스의 특징 비교
| 특징 | MySQL | PostgreSQL | MongoDB |
|---|---|---|---|
| 데이터 모델 | 관계형 | 관계형 | 문서 기반 |
| ACID 준수 | 완전 지원 | 완전 지원 | 부분 지원 |
| 확장성 | 수직 확장 | 수직 확장 | 수평 확장 |
| 복잡 쿼리 | 우수 | 매우 우수 | 제한적 |
| JSON 지원 | 기본 지원 | 고급 지원 | 네이티브 |
| 성능 | 빠름 | 중간 | 매우 빠름 |
| 학습 곡선 | 낮음 | 중간 | 낮음 |
프로젝트별 권장사항
웹 애플리케이션 개발
- 전통적인 CRUD 작업이 많은 경우: MySQL
- 복잡한 분석 쿼리가 필요한 경우: PostgreSQL
- 빠른 프로토타이핑이 필요한 경우: MongoDB
데이터 분석 플랫폼
- 대용량 데이터 처리: PostgreSQL
- 실시간 분석: MongoDB
- 정형화된 리포팅: MySQL
게임 백엔드
- 플레이어 데이터 관리: MongoDB
- 게임 통계 분석: PostgreSQL
- 랭킹 시스템: MySQL
마무리
루아와 데이터베이스 연동은 현대 애플리케이션 개발에서 핵심적인 기술입니다.
각 데이터베이스의 특성을 이해하고 프로젝트 요구사항에 맞는 선택을 하는 것이 중요합니다.
MySQL은 안정성과 성능을 제공하며, PostgreSQL은 고급 기능과 확장성을 제공합니다.
MongoDB는 유연성과 빠른 개발 속도를 제공합니다.
이번 시리즈를 통해 루아의 데이터베이스 연동 능력을 충분히 활용하시기 바랍니다.
다음 시리즈에서는 루아를 활용한 마이크로서비스 아키텍처에 대해 다루겠습니다.
참고 자료:
이전 글: 루아 입문 시리즈 #17: 분산 시스템에서의 루아
루아 입문 시리즈 #17: 분산 시스템에서의 루아
루아(Lua)는 가볍고 빠른 스크립팅 언어로, 마이크로서비스 아키텍처와 로드 밸런싱, 서비스 디스커버리 등 분산 시스템 구현에 탁월한 성능을 보여주는 프로그래밍 언어입니다.분산 시스템은
notavoid.tistory.com
'프로그래밍 언어 실전 가이드' 카테고리의 다른 글
| 루아 입문 시리즈 #20: 루아 생태계와 미래 (0) | 2025.07.06 |
|---|---|
| 루아 입문 시리즈 #19: 루아 보안 프로그래밍 (0) | 2025.07.05 |
| 루아 입문 시리즈 #17: 분산 시스템에서의 루아 (0) | 2025.07.04 |
| 루아 입문 시리즈 #16: 루아 메타프로그래밍 (0) | 2025.07.04 |
| 루아 입문 시리즈 #15: 루아 테스팅과 CI/CD (0) | 2025.07.03 |


